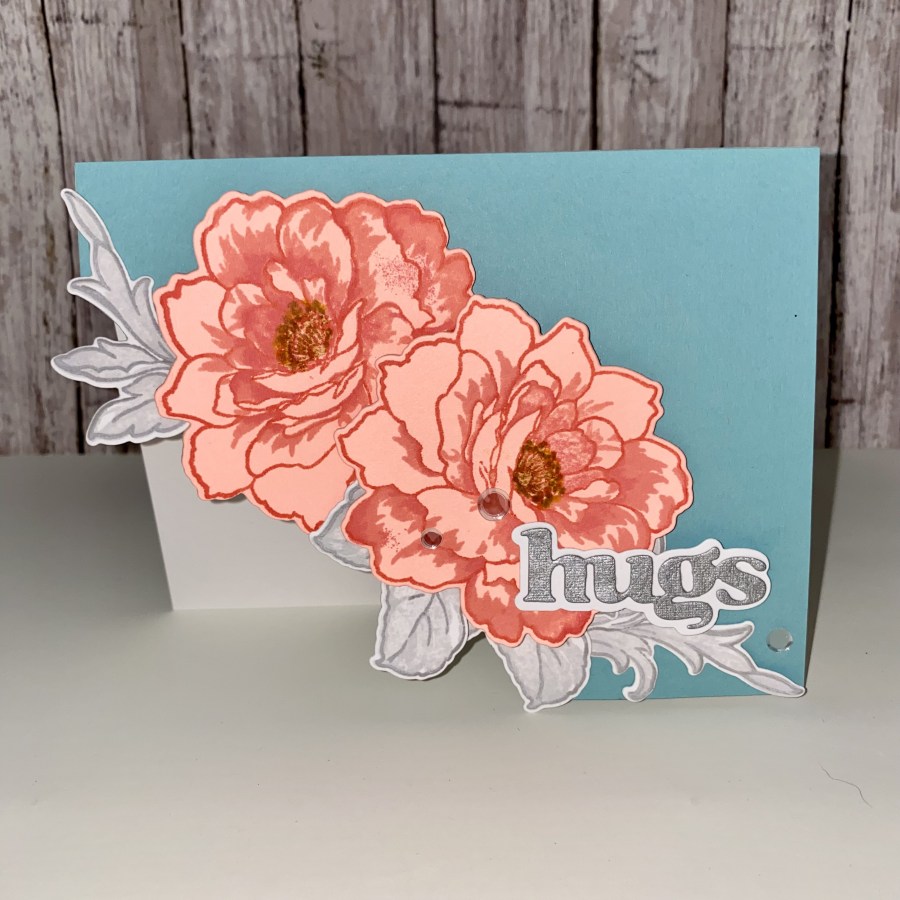
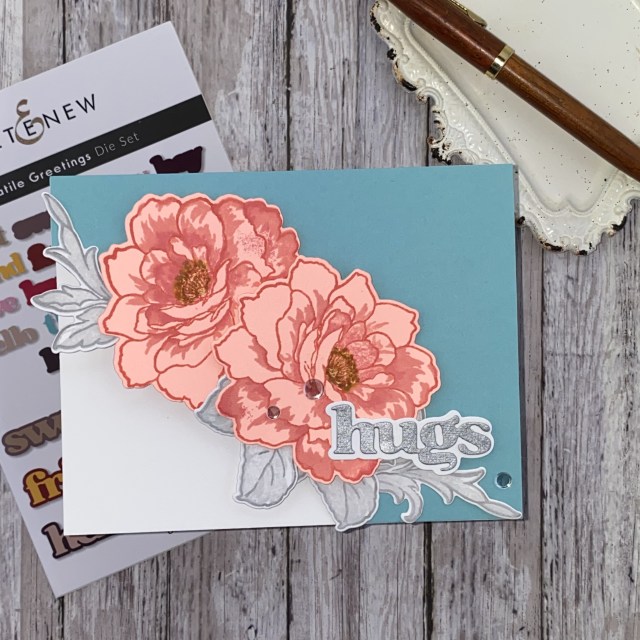
Hello creative friends! Today I’m sharing a card that I made after participating in Altenew Academy’s With a Twist online course. I chose one of my favorite stamp sets, Altenew’s Golden Days. It’s a beautiful flower, and I find it works for almost any occasion. I like the additional leaf that looks more like a flourish. Yes, part of the fun of this hobby is collecting all the stuff, but I do find I tend to grab my favorites time and time again. Try learning new techniques and trying different color combinations with the stamps, dies, and stencils that you already own. You’ll be amazed with what you can create, and the completely different looks you can achieve!
Some of the “things with a twist” that I did with this card included starting with colored cardstock. I actually started with a lighter coral/salmon color. I usually would start with white, and let the inks do all the heavy lifting. I selected some matching inks, which happen to be Ranger Tim Holtz’s Distress Oxide ink pads. After I stamped the flowers on the lighter cardstock, I decided to go a little more outside of my usual box (the point of this course), and tried the same inks on a bit more vibrant color cardstock, which is what I ended up going with for the final card. I did not use the largest layering stamp, or one of the flower center pieces. (It’s okay – there are no rules that you have to use them all!) I like how by using the colored cardstock to stamp on, you don’t end up with a white border around the outline, as you would if you used white cardstock to start. Not the look I’ll be going for every time, but it’s great when you happen to have the right color paper on hand, and you want to “twist” things up a bit!
Next I picked a bunch of colored paper from my stash, mostly blues, but some greens, reds and yellows. I decided to head towards a blue, and finally selected this teal blue.
Another twist was using a neutral for the leaves. I tried both tans and grays, and decided to go with the gray to keep the cooler look for the card.
Here’s the big one: cutting off the corner and having the card front reveal the inside of the card. I don’t think I’ve ever done this before, but I do really like how it came out.

This card was pretty straight forward as far as putting it together, so I didn’t take any in-process photos. I’d suggest to stamp and diecut your pieces, arrange them on the card, and then decide where you want to trim the front panel. Be mindful of your layering to create some interest, and add more diecuts if necessary. I ended up adding another leaf cluster at the end. The “hugs” sentiment was created with a small piece of metallic matte paper from my stash. To finish this card, I attached the front panel to a 4.25″ by 5.5″ base made with Neenah Classic Crest 100 lb cardstock, trimmed to match the front panel. A few confetti sequins were added to accent the sentiment. Thank you for stopping by my blog. I appreciate you!
Altenew products used:
Altenew Golden Days Layering Stamp Set
Altenew Golden Days Die Set
Altenew Versatile Greetings Die Set
Ranger Distress Oxide Ink Pads – Abandoned Coral, Worn Lipstick, Salwater Taffy, Hickory Smoke, Lost Shadow, Brushed Corduroy, Fossilized Amber

This looks stunning! LOVE the colours!!!
LikeLike