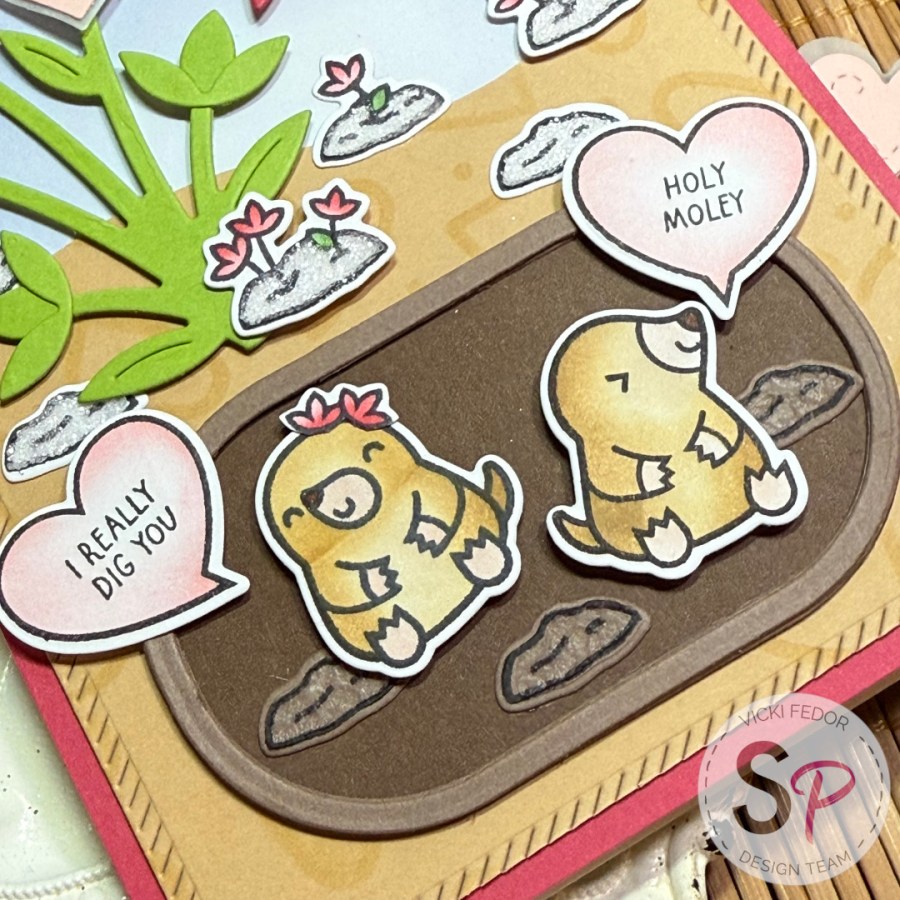
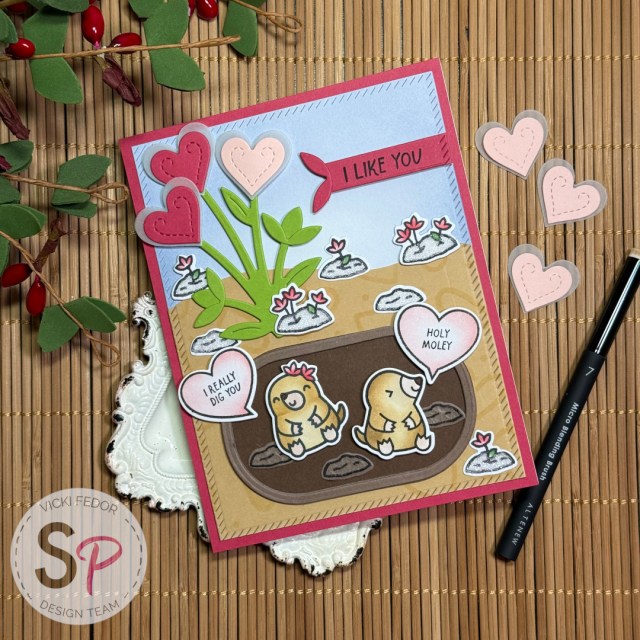
Hello ScrapbookPal friends! Out with Christmas, in with Valentine’s Day! And what is more fitting than a new Lawn Fawn stamp set featuring …moles!? Well, probably lots of things, but these guys are pretty cute, and sure to be the most unique card your Valentine will receive! The Lawn Fawn – Clear Stamps – A Mole Lot of Love comes with coordinating dies (Lawn Fawn – Lawn Cuts – A Mole Lot of Love) and stencils (Lawn Fawn – Coloring Stencils – A Mole Lot of Love), and also an add-on stamp set that I did not use for this card. I have a ton of moles in my yard. They don’t seem to look anything like these guys up close, but they don’t really bother anything, (except my tulip bulbs) and I tell myself that they are providing underground aeration to my grass. Forget about that, let’s get into this adorable card!
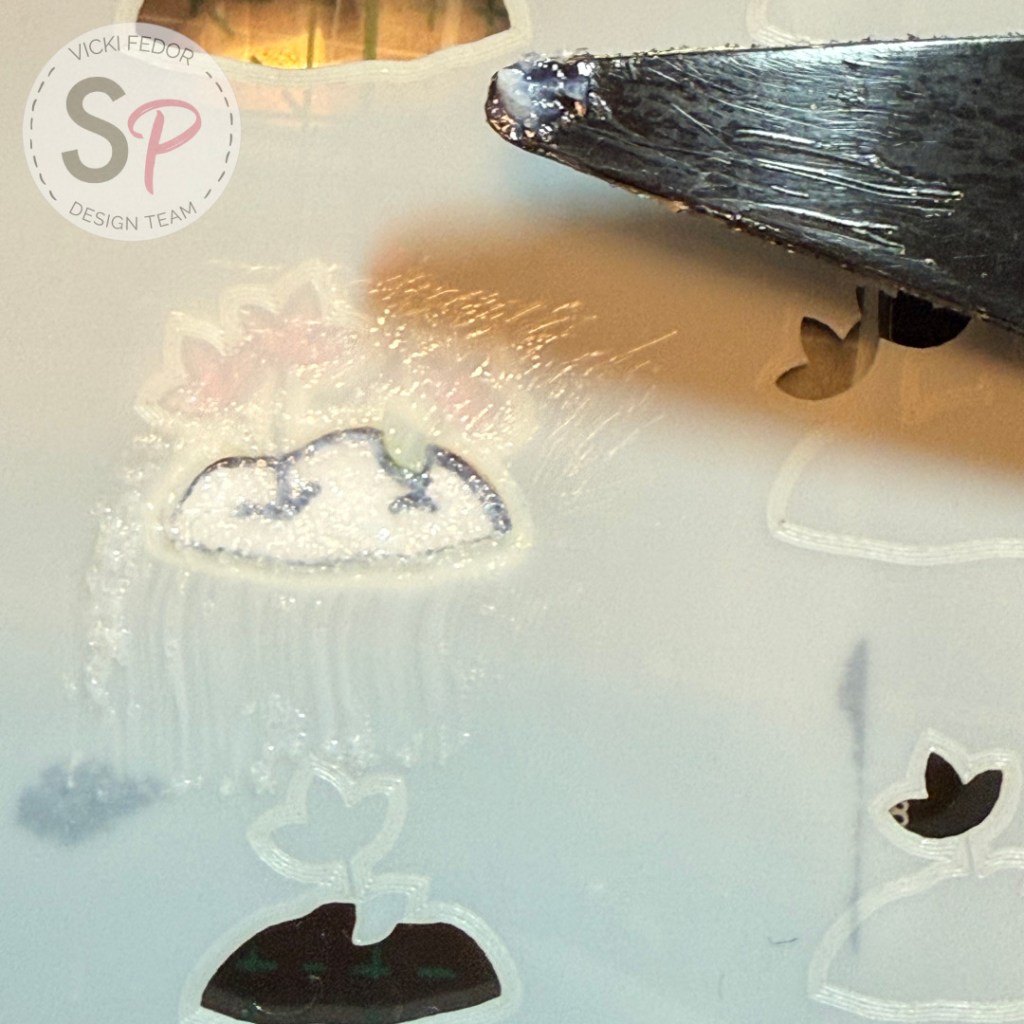
I love all of the Lawn Fawn critters, but honestly did not think I needed the stencils, because I always thought of coloring them with Copic markers. Talk about a *real* game changer! Now that there are many brands with mini and micro blending brushes, the stencils are a “must have”. They make ink blending on these little guys so very easy. I also used some texture paste with them, and I love the effect! Since I wasn’t quite sure where I was going with this card initially, I started by stamping and ink blending. I used Distress ink in Brushed Corduroy and Tattered Rose for the moles, applied through the stencils with Spellbinders Mini Blending Brush Set and Altenew – Micro Blending Brush Set. The noses got a dab of Copic Sketch Marker E29, also through the stencil. I love all of these small brushes, but my go-to favorite seems to be the Altenew 7mm brush. The stencils gave me the idea of having the flowers coming up from snow, instead of dirt, which is what I think they intended with this tiny stamp. After I colored the flowers with the coloring stencils I added Ranger Ink – Tim Holtz – Distress Grit Paste – Snowfall with a palette knife (or use your finger). I thought I should have die cut the flowers first before applying the snow grit paste, but as long as the paste is dry, it worked fine adding it on, and then running it through my Big Shot to cut it out. I also tried it by cutting out the die first. You’ll need to use a grip mat to hold it in place to apply the paste if you do cut it out first.
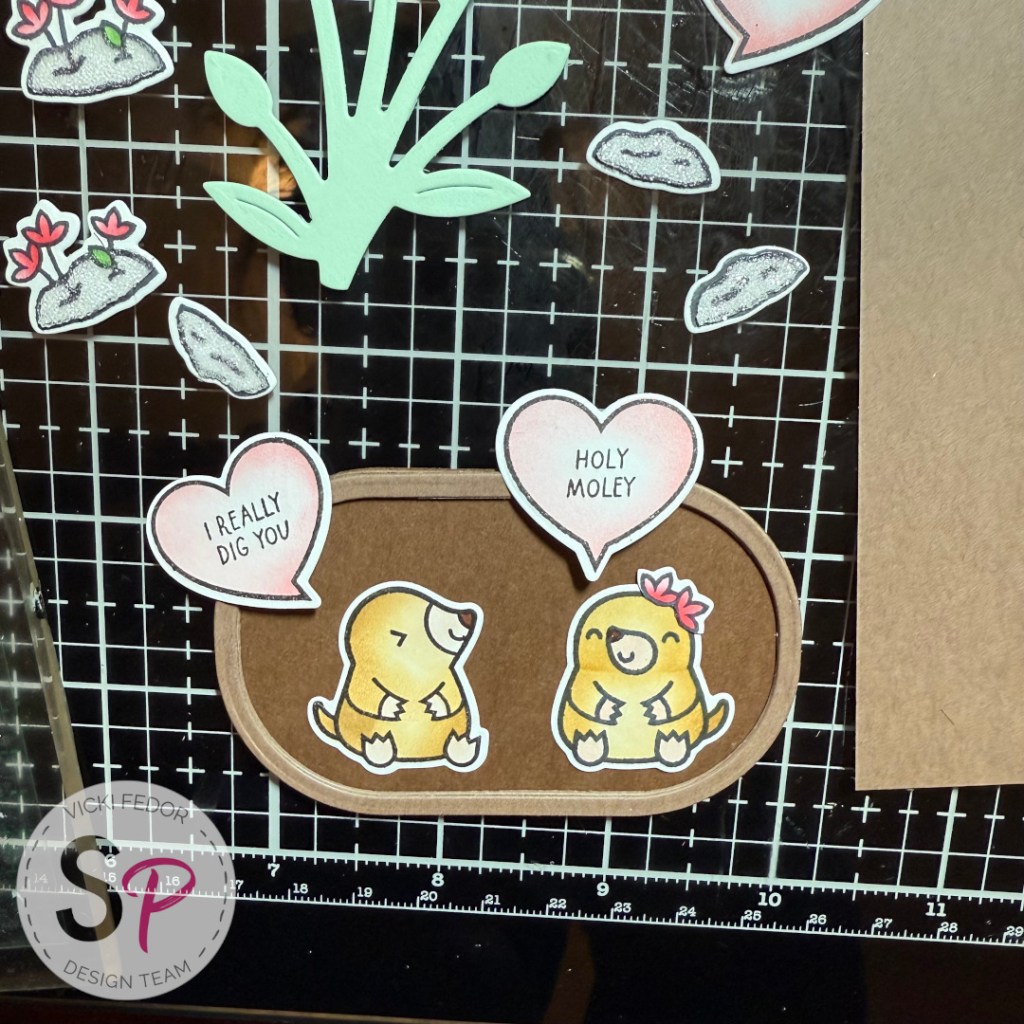
Initially, I thought of having my moles sitting under the Lawn Fawn – Lawn Cuts – Heart Blooms flower, but decided to have them snug and cozy underground, because there would be snow on the ground, after all. I used Spellbinders – Stylish Ovals Collection – Dies – Essential Stylish Ovals to make them a little burrow.
To go with my late winter theme, I applied Distress Oxide Ink in Stormy Sky with a blending brush for part of the background, and then used another new Lawn Fawn stencil, Lawn Fawn – Stencils – Outline Hearts, to add some interest to the tan (Spellbinders Fawn) background on the rest of the card. This was done with Distress Ink Antique Linen. I ended up covering up most of it, but I still think it added some texture instead of just having plain tan cardstock.
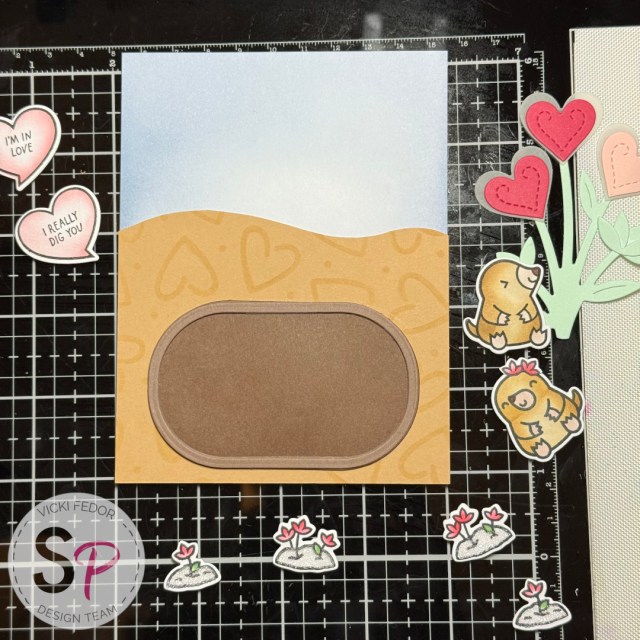
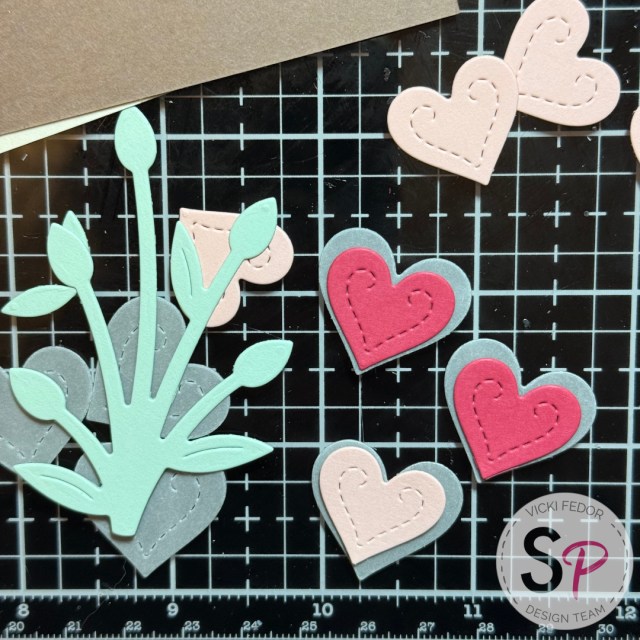
I assembled the Lawn Fawn – Lawn Cuts – Heart Blooms piece for the “above ground” focal point. At first I had selected Mint cardstock, but I ended up switching it out for Rainforest. The mint was too washed out against the sky. I used the smaller heart dies for the cardstock, and layered them on vellum hearts cut from the larger heart dies.
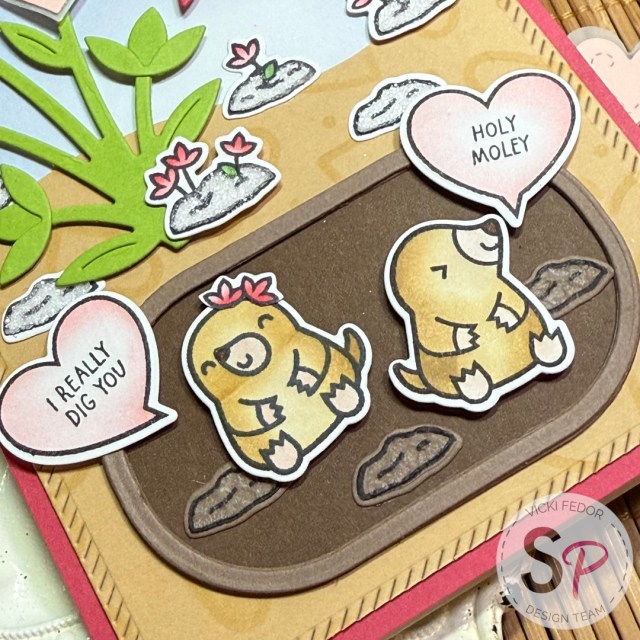
I also stamped and die cut a few of the dirt mounds without the flowers on brown paper, and used a thin layer of Ranger Ink – Texture Paste – Transparent Matte to give the dirt in their burrow some texture. I cut a piece of red (Wild Berry) cardstock for a frame, and used Scrapbook Adhesives Foam Squares Variety Pack, Scrapbook Adhesives Thin Foam Squares Variety Pack, and Bearly Art Precision Craft Glue to attach everything to my A2 white cardbase.
Thank you for visiting my blog. I hope 2026 is off to a good start for you! My supplies are listed below, and available at ScrapbookPal.com!
Products used in this project, available at ScrapbookPal.com:
Lawn Fawn – Clear Stamps – A Mole Lot of Love
Lawn Fawn – Lawn Cuts – A Mole Lot of Love
Lawn Fawn – Coloring Stencils – A Mole Lot of Love
Lawn Fawn – Lawn Cuts – Heart Blooms
Lawn Fawn – Stencils – Outline Hearts
Spellbinders – Stylish Ovals Collection – Dies – Essential Stylish Ovals
Pinkfresh Studio – Dies – Nested Rectangles Diagonal Stitch
Ranger Tim Holtz Distress Oxide Ink Pad – Stormy Sky, Festive Berries
Ranger Tim Holtz Distress Ink Pad – Rustic Wilderness, Antique Linen, Brushed Corduroy, Tattered Rose
Ranger Ink – Tim Holtz – Distress Archival Ink Pad Stack – Black Soot
Ranger Ink – Tim Holtz – Distress Grit Paste – Snowfall – 3 oz.
Ranger Ink – Texture Paste – Sampler – 3 Pack – Transparent Matte
Spellbinders Mini Blending Brush Set
Altenew – Micro Blending Brush Set
Bearly Art Precision Craft Glue – The Bundle (with precision tip)
Scrapbook Adhesives Foam Squares Variety Pack
Scrapbook Adhesives Thin Foam Squares Variety Pack
Copic Sketch Marker E29