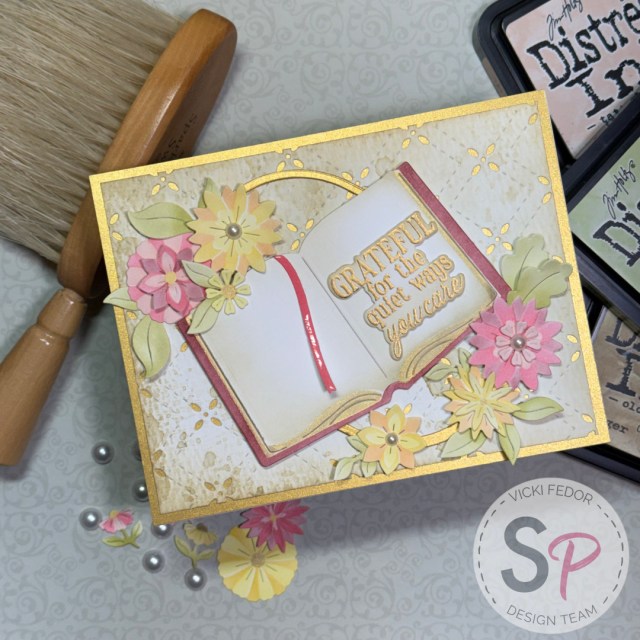
Hello ScrapbookPal friends! There was a saying when I grew up – “Reading is Fun*damental!” So is this set which includes Pinkfresh Studio – Dies – Floral Tale and Pinkfreah Studio – Stencils – Floral Tale! Just think of all the ways you can use it – books are everywhere and encompass all things, and of course can be very fun. They’re prevalent in schools and places of religion, and used for leisure activities. They can be used to represent comfort or knowledge, stories of our lives, stories of adventure, bedtime stories, or songs like Bob Seger’s “Turn the Page”. So many things! I plan to be using this die set over and over. To start, I wanted to make a card that had the look and feel of old… not super old, but maybe a card my mother would have saved. I wanted a soft, muted palette and intricate details. Pearls for sure.
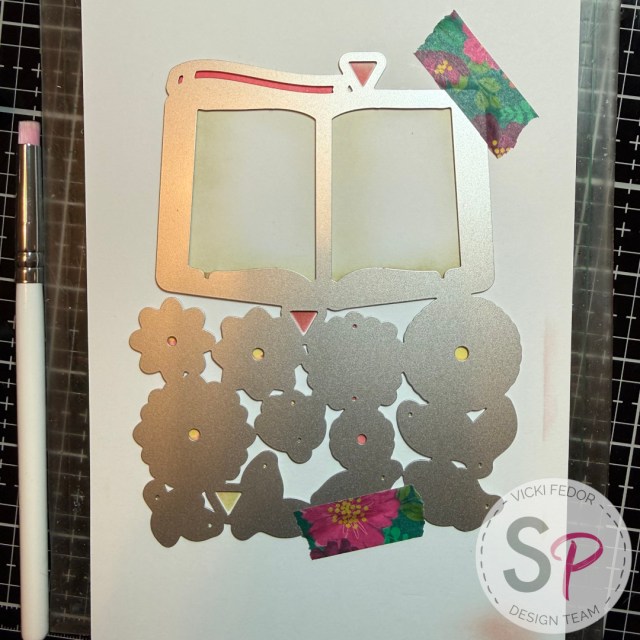
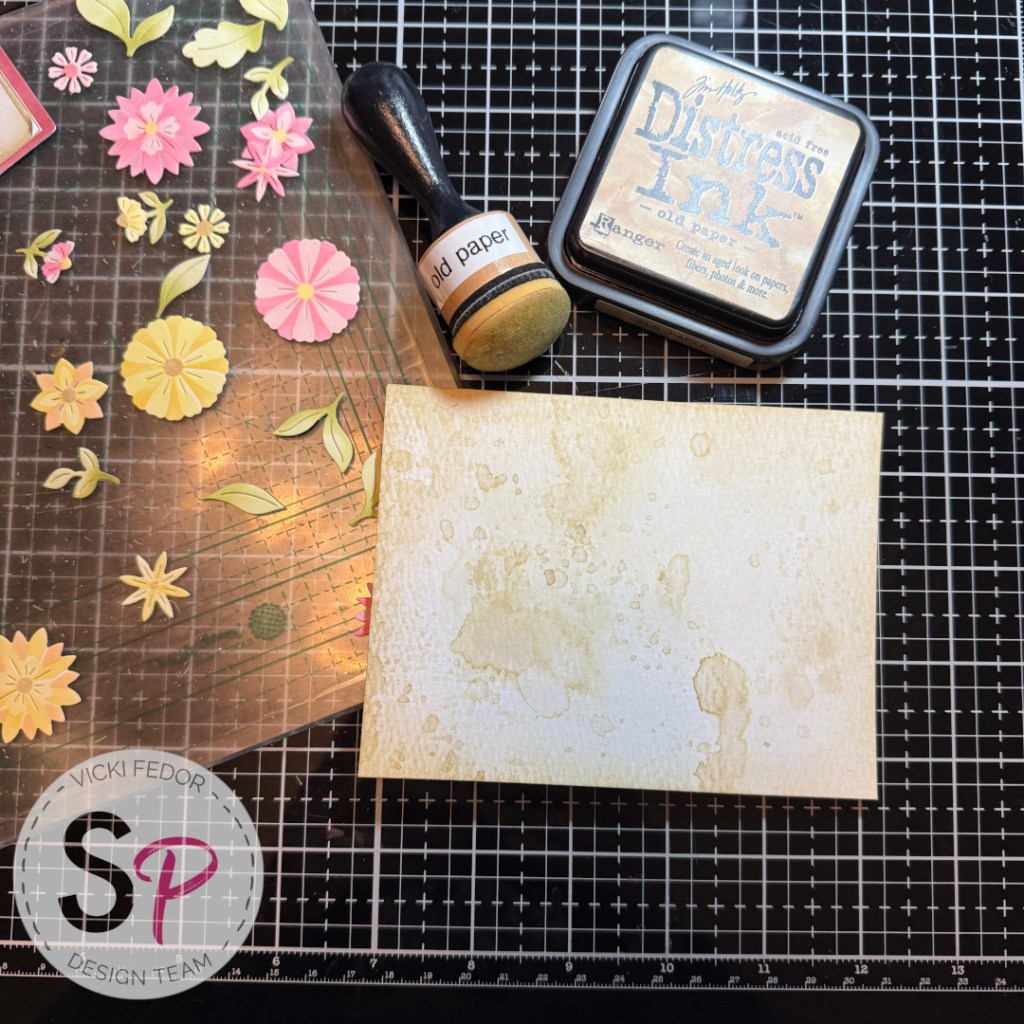
I selected colors from the Ranger Tim Holtz Distress Inks. Old Paper, of course, then soft pinks and yellows. I chose my favorite good quality smooth white cardstock. The stencils made it so easy. One thing I had to get used to was that you don’t stamp anything first. There is no outline stamp to line up the stencils. You just begin coloring with the first stencil. You can see that there is a triangle at the top of the book, and two more in the middle of the stencils. These are the keys that you line up the other stencils with, and eventually the die. I used Old Paper, Aged Mahogany, and Lisa Horton Crafts Cloud 9 Metallic Solid Gold for the book. I thought of those old books that had gold on the edges of the pages. For the flowers, I added Tattered Rose and Worn Lipstick, along with the Aged Mahogany. All three of these pinks are available in Ranger Ink – Tim Holtz – Distress Mini Oxide Ink Pads – Kit 13. I finished the flowers and leaves with Squeezed Lemonade, Shabby Shutters, and Peeled Paint. A very smart and crafty woman once suggested to make more pieces than you think you need – “It’s only paper”. So I made another set of flowers with yellows, including Squeezed Lemonade, Fossilized Amber, and Dried Marigold. I then had plenty of pieces to choose from while arranging my final layout.
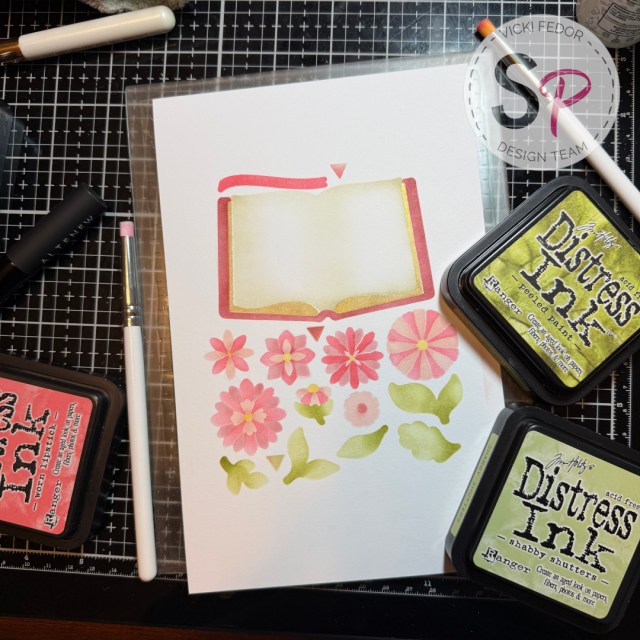
Thinking about the background, I used a piece of water color paper and the “ink smooshing” technique to create an old time none-the-worse-for-wear background. I embellished it with the lovely cover plate die, Pinkfresh Studios – Dies – Petal Trellis Coverplate. I wanted to bring out the gold edges on the book, so I layered this background over a gold piece of cardstock. I used the same gold cardstock to cut an oval frame from Spellbinders – Stylish Ovals Collection – Dies – Essential Stylish Ovals to use as an anchoring point for my book.
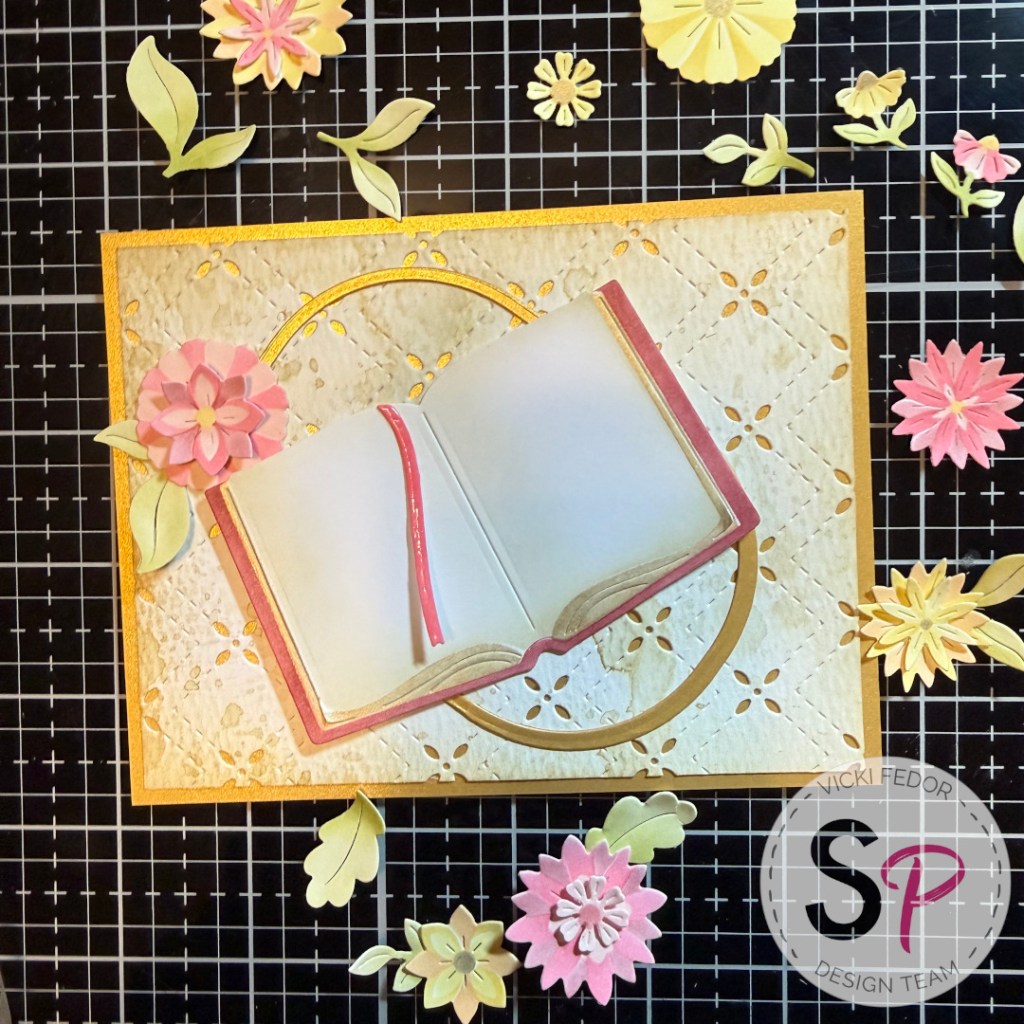
I applied Glossy Accents to the ribbon bookmark. It added shine and dimension, and a touch of sophistication. It’s all in the tiny details!
I chose a sentiment from Pinkfresh Studio – Clear Stamps – Heartfelt Chapters, stamped with Versamark Ink, embossed in gold, and then used the coordinating Pinkfresh Studio – Dies – Heartfelt Chapters.
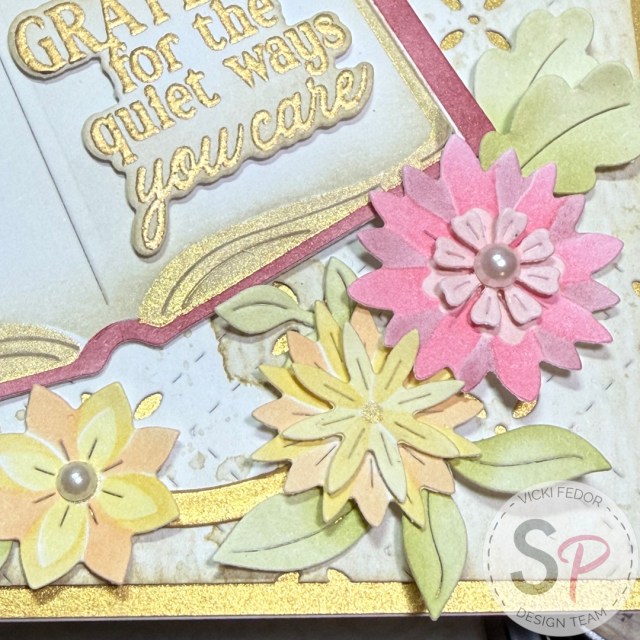
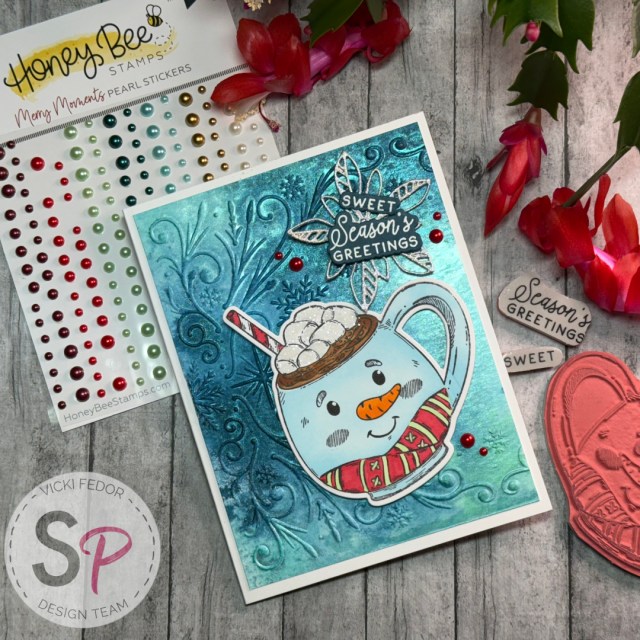
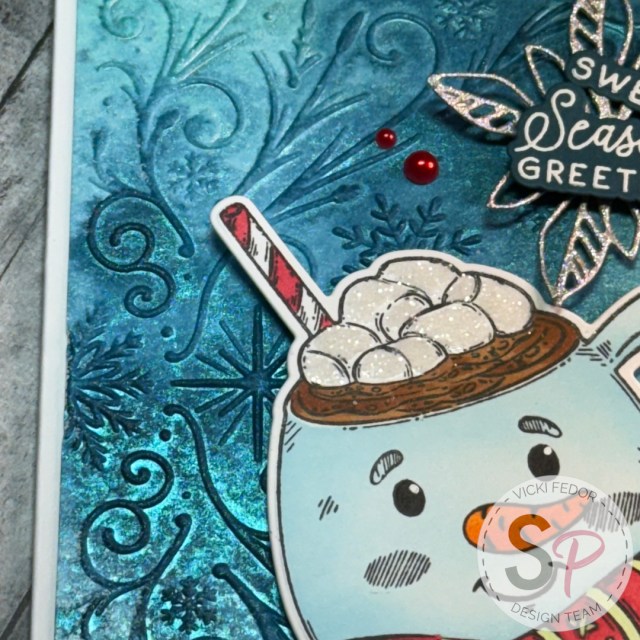
I assembled the card using Scrapbook Adhesives Foam Squares Variety Pack, Scrapbook Adhesives Thin Foam Squares Variety Pack, and Bearly Art Precision Craft Glue to attach everything to my A2 white cardbase. A few pearls from Honey Bee Stamps – Pearl Stickers – Merry Moments were the perfect final addition.
Thank you for visiting my blog. I can’t wait to see how these sets are used by you! My supplies are listed below, and available at ScrapbookPal.com!
Products used in this project, available at ScrapbookPal.com:
Pinkfresh Studio – Dies – Floral Tale
Pinkfresh Studio – Stencils – Floral Tale
Pinkfresh Studio – Clear Stamps – Heartfelt Chapters
Pinkfresh Studio – Dies – Heartfelt Chapters
Pinkfresh Studios – Dies – Petal Trellis Coverplate
Spellbinders – Stylish Ovals Collection – Dies – Essential Stylish Ovals
Ranger Ink – Tim Holtz – Distress Mini Oxide Ink Pads – Kit 13 (Tattered Rose, Worn Lipstick, Aged Mahogany, Barn Door)
Ranger Tim Holtz Distress Ink Pad – Squeezed Lemonade, Fossilized Amber, Dried Marigold, Shabby Shutters, Peeled Paint, Old Paper
Lisa Horton Crafts – Cloud 9 Metallic Ink Pad – Limited Edition 3 Pack – Silver, Gold, Copper
Tsukineko – Versamark Watermark – Stamp Pad
Spellbinders Mini Blending Brush Set
Altenew – Micro Blending Brush Set
Ranger Ink – Mini Ink Blending Tool
WOW! – Embossing Powder – Super Fine – Metallic Gold Rich
Ranger Ink – Glossy Accents, 0.5 oz.
Bearly Art Precision Craft Glue – The Bundle (with precision tip)
Scrapbook Adhesives Foam Squares Variety Pack
Scrapbook Adhesives Thin Foam Squares Variety Pack
Honey Bee Stamps – Pearl Stickers – Merry Moments