

Hello crafty friends! This was definitely what it was supposed to be – a challenge! Of course I may have overthought it, but I guess we shall see! I am participating in the Altenew Educator Certification program. You may have seen some of my posts as I worked through the Level 1 courses. After completing the courses, I am given a final challenge to complete in 3 weeks. That seems like plenty of time, unless your work life gets busy, and the gardens need spring clean up, and your kid is getting married, and… Well, you get it. There’s never enough time for creativity!
My challenge was to create a gift set of his and her cards, one masculine and one feminine, The cards were supposed to vary, and have a similar and cohesive theme. There had to be a total of 8 to 12 cards, and I needed to use one recycled element on the cards or in the packaging. I also needed to use and reference techniques that we used from 3 of the 10 classes we took for the Level 1 course. I could write a blog post or a video.
Although I used techniques from each one of the 10 classes that I took, I concentrated on techniques from Celebrations: Stencil Techniques, Easy Die Cutting Techniques, and All about Layering 4. I used ideas from Celebration: Stencil Techniques in all of my cards. These included dulling the stickiness of low tack tape, circular motions when ink blending through stencils, securing the stencil on the back of the cardstock, cleaning tools immediately, tinting texture paste with ink, using watercolor cardstock, using complementary colors, using anti-static powder, and heating vellum gently from the back. Easy Die Cutting Techniques reminded me to get the matching dies when available for stamp sets, use negative die cutting (shaker window), use shaker cards, and mix and match die cuts from different sets.Some of the techniques used in All About Layering 4 include snipping away parts of die cuts you don’t need, creating die cut stacked sentiments to add dimension, using both glue and foam tape to add dimension, coloring texture paste, and ink blending behind images.
To keep a cohesive theme, I stuck with one color scheme for each of the sets. For the feminine set, I used Altenew Crisp Dye Ink Sets in Rose Petal, Enchanted Garden, Green Fields, and Summer Afternoon. The masculine cards used Altenew Fresh Dye Ink Sets in Woodland Escape, Frosted Foliage, and Blue Mountains. I also limited myself to one stamp set and one die set for the focal points of each card in the feminine series. For the masculine series, I added one additional stamp set, so as to not have them all floral themed. All of the cards used white cardstock for the majority of the background. All of the cards used the same stencil in one way or another. 6 out of the 8 cards used the same Sentiment die set (Versatile Greetings – love this one!).


Let’s take a quick look at each card, starting with the feminine set. For the first card, I used the Square Weave Pattern stencil to dry emboss a piece of white cardstock for the background. I did not have an embossing pad for my die cut machine (Sizzix Big Shot), so I used a piece of fun foam under the paper, and laid the stencil on top of the paper. I ran this through my machine 3 times, using the standard plates. It’s very subtle, but also adds just the right amount of interest. I like the effect, and it’s a simple way to get more use out of your stencils, For the flowers, I used 110 white cardstock with the Sulfer Cosmos Layering Die Set. After I cut the dies, I placed them back in the negative space, and ink blended the petals, before gluing them together. For the purple base layer and “hugs” sentiment, I used the darkest shade, Andromeda, in Enchanted Garden direct-to-paper. The sub-sentiment is from Sentiment Strips 3 Stamp Set, and was stamped in black and then embossed with clear embossing powder.
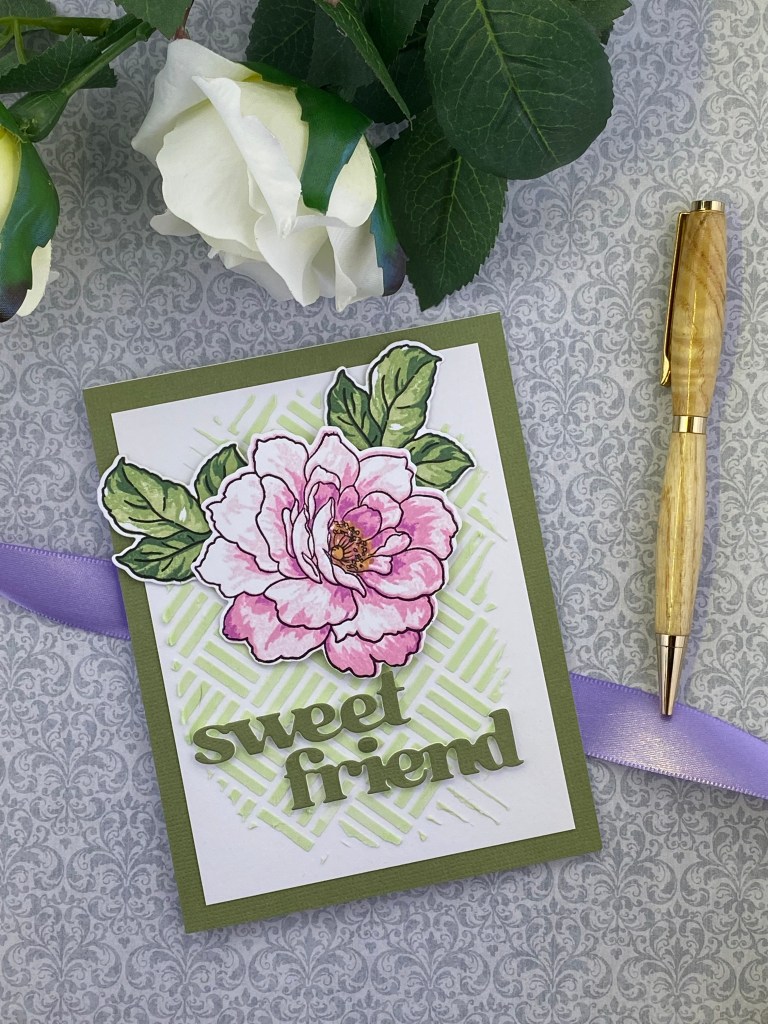
The next card used the Golden Days stamp set with the coordinating dies. For the background, I dyed some opaque texture paste with Forest Glades ink, and then applied that through the stencil. After that dried, I layered the flower and leaves with dimensional foam squares that were two different thicknesses. The “sweet friend” sentiment was cut from cardstock to coordinate with the background, layered on top of a white diecut, and then popped up using dimensional foam squares which were cut to fit.
The “celebrate” card used the stencil to create an ombre effect for the background. I used the 3 lighter colors from the Rose Petal ink set. The main sentiment was cut from silver shimmer paper, and layered on to another white die cut. I glued that to the card, and then popped up the sub-sentiment, “Sparkle on, Darling”, from Sentiment Strips 3, with extra thick squares. I wanted the sub-setiment to be more prominent than the “celebrate” main sentiment. The smaller Sulfur Cosmos flower was lightly inked using the Summer Afternoon yellows and light greens from the Green Fields mini ink set.

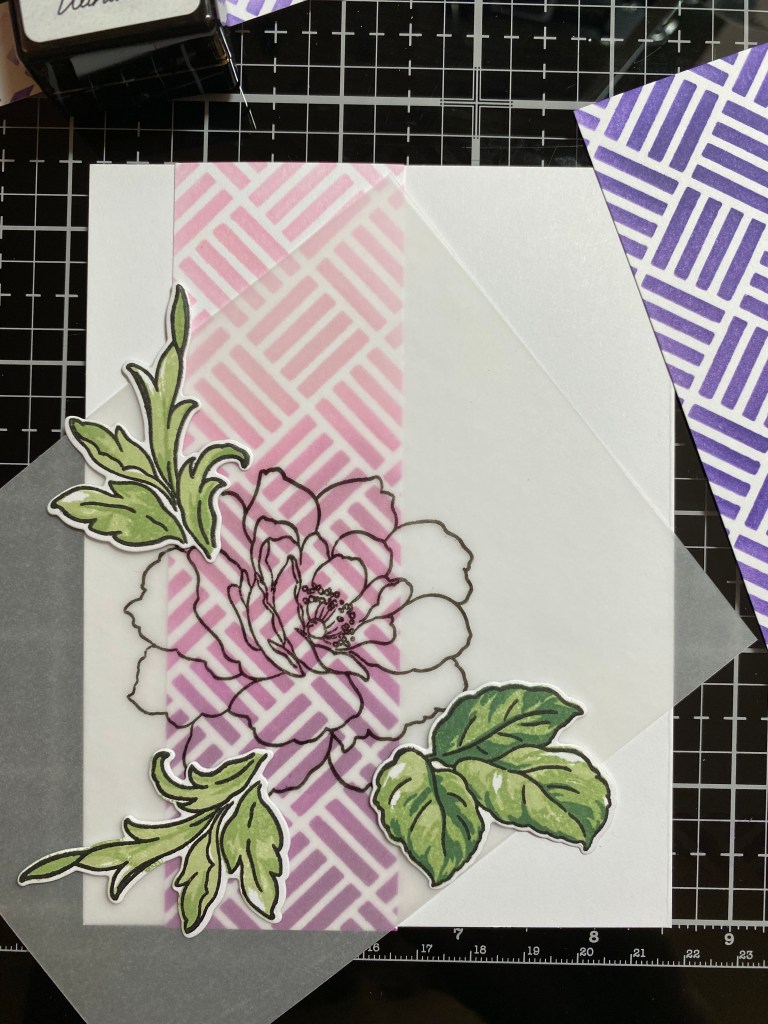
The final feminine card is a shaker card. I had the idea to use vellum instead of clear acetate for the shaker window, just because I had never seen it done before, and I didn’t have any super interesting shaker elements. I stamped the outine from Golden Days in black ink, and then applied clear embossing powder and carefully heat set it, so as not to burn the vellum, I added a strip of paper that I had ink blended through the stencil, and then die cut the window for the shaker using the Golden Days die. Two leaf clusters were layered on top of the card around the window. After applying the vellum flower to the back of the cardfront, I created space for the shaker filler using foam tape, added the sequins, and then sealed up the card with a piece of pink cardstock, which would also serve as a border. I applied a few sequins and the “hello” sentiment from Versatile Greetings.


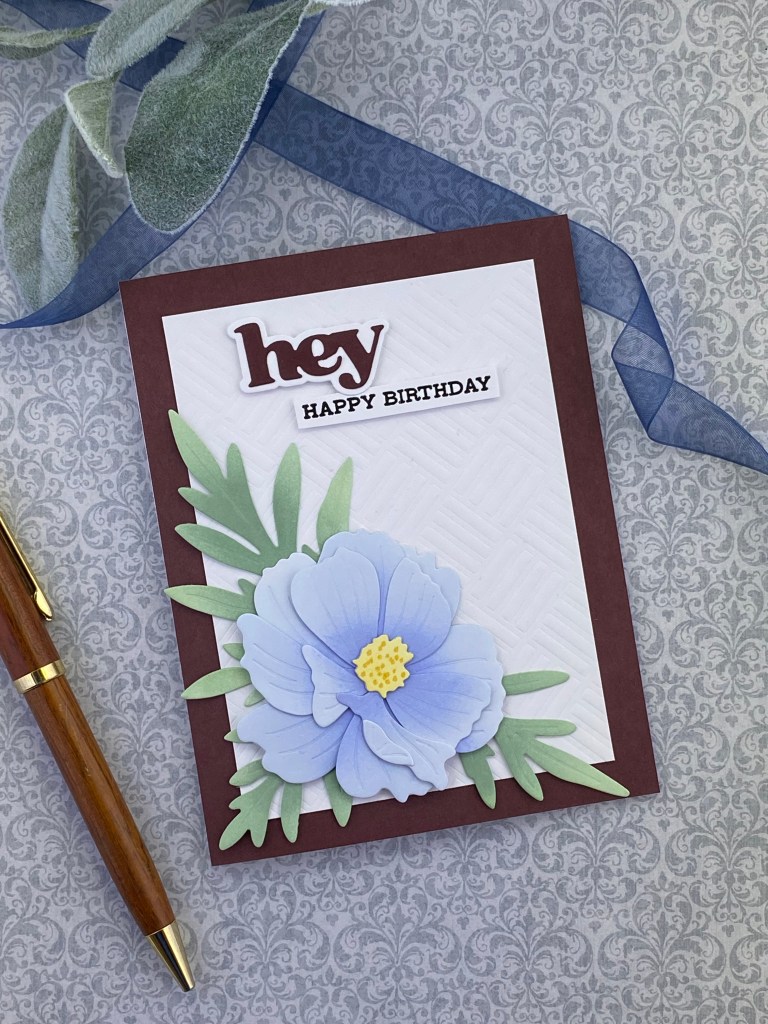
The masculine cards were made with a similar thought process as the feminine cards, but with the goal of having them be distinctly different. The first masculine card used the dry embossed stenciled background, only one of the Sulfur Cosmos flowers, and a different layout. The background border and sentiment were colored direct-to-paper with Redwood Fresh Dye Ink. Different thicknesses of foam sqaures were used to create dimension.
The second masculine card used opaque texture paste through the stencil, but the paste was colored with Eucalyptus from Frosted Foliage. I had originally thought I would use a different set of leaves on this card to mix things up a bit. I used the leaves from Jumbo Garden Picks Layering Die Set, lightly blending some Silver Sage onto one of the layers. I just wasn’t super pleased with the finished card, I ended up making some different leaves using the Golden Days stamp set and the Woodland Escape Fresh Dye Mini Ink set. This is way out of the box for me! Brown leaves? And it’s not Fall? Well, I actually liked them a lot better. Sometimes I have to walk away from my desk for a bit, and come back with fresh eyes. When I was a winemaker, we would talk about “palate fatigue” from too much wine tasting (without consuming). It’s like sensory overload for your tastebuds, and soon you’re not able to differentiate or determine flavor components. I suppose it’s the same with my eyes, or my brain. After a short break, I was happy with this card, and happy with myself from stepping out of my comfort zone.


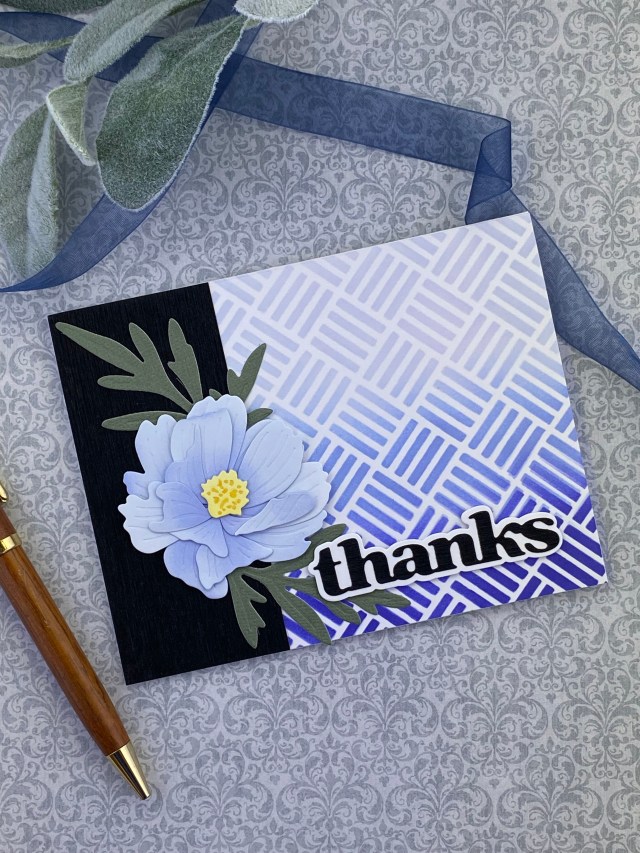
For the next card, I decided to bring some black in. I used black shimmer paper to add a touch of sparkle, like my feminine Celebrate card. I blended Water Hyacinth, Alpine Aster, and Crystal Violet from the Blue Mountains Fresh Dye Mini Ink set through the stencil to create the background, and tried to stick with the rule of thirds, which I learned in one of the classes, but I can’t remember which one!
The last masculine card was a shaker card, again using vellum for the windows. This time I brought in a more “masculine” stamp set that I saw in the “For the Guys” course. This was maybe the hardest card to design, as I don’t tend to do a lot with critters or scene building (yes, there’s a good course for the too). I ended up making this shaker card with 4 different compartments. To try to line everything up as close to perfect as I could get, I used strips of paper between multiple square dies (from Sizzix Tim Holtz) to get my windows straight and evenly spaced. For the sentiment, I used this lovely Oscar Wilde thought (not Altenew). I put a small strip of ombre blended stenciled paper in the background to keep this card within my theme.


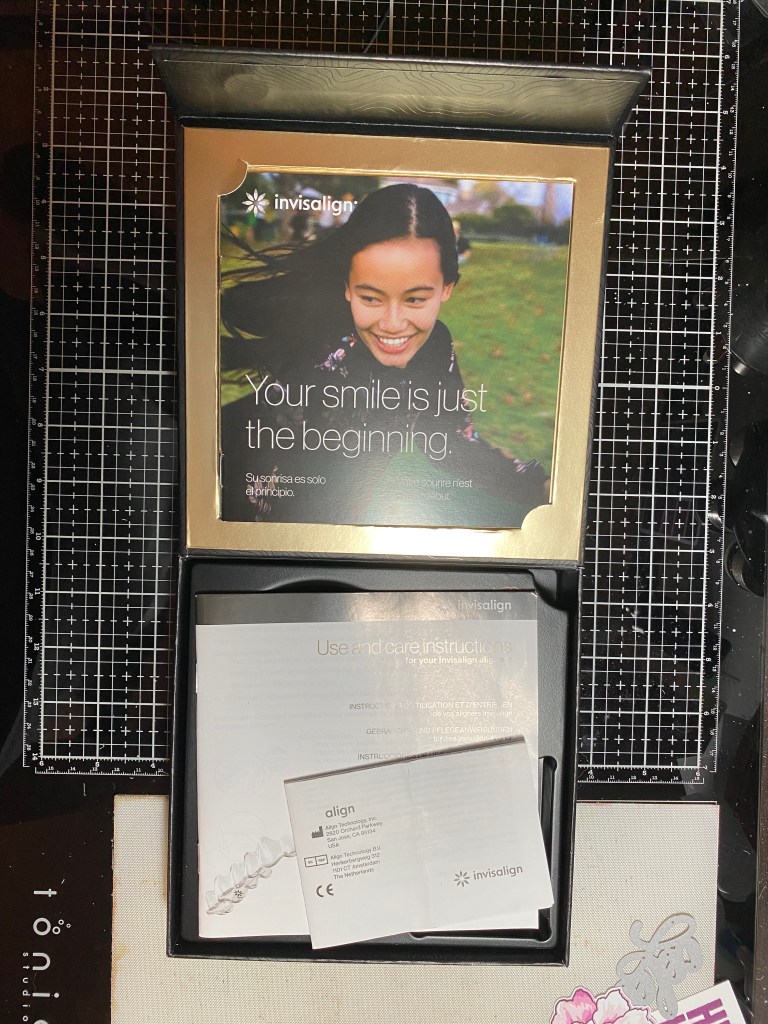
The final piece was to create a gift box for the cards. This is where I used my recycled component. I had a nice cardboard box that came with my Invisalign retainers. The top closes with a magnet. I had saved it because I thought I could store something in it, like colored pencils or something. Even though the cards didn’t exactly fit, they fit well, and I thought I could tie them in separate bundles with ribbon. The outside of the box was black. I decided to cover it with some beautiful Altenew Fabric I has gotten as a gift with purchase a while back. Since the fabric had a white background, I first covered the outside of the box with white cardstock, using Ranger Collage Medium. Then I ironed the fabric, turning under the edges to fit the box, and applied that using more collage medium. There happened to be an insert inside the box to hold marketing literature, which was a perfect place to put a little “For You” message, including a “handmade by Vicki Fedor 2023” stamp that was a bonus 9th Anniversary celebration gift from Altenew.


Thanks for stopping by my blog. Wish me luck on passing this challenge! I appreciate you!
Altenew products used:
Craft-A-Flower: Sulfur Cosmos Layering Die Set
Golden Days Layering Stamp Set and Die Set
Square Weave Pattern Stencil
Geometric Menagerie Stamp Set
Sentiment Strips 3 Stamp Set
Sending Hugs Outline Stamp Set
Fancy Celebrate Die
Fancy For You Die
Versatile Greetings Die Set
Crisp Dye Mini Ink Sets – Rose Petal, Enchanted Garden, Green Fields, Summer Afternoon
Fresh Dye Mini Ink Sets – Woodland Escape, Frosted Foliage, Blue Mountains
Also used:
Hero Arts Literary Quotes Stamp Set
Sizzix Tim Holtz Thinlits Stacked Tiles Squares

A very well-put-together post, Vicki! You have done an excellent job creating the projects. The detail and work you have put into creating every card, plus the box, is commendable! Well done!
LikeLike
Thank you so. much. Can I go on to Level 2 now?
LikeLike