
Hello creative friends! Today I’m sharing a card that I made after participating in Altenew Academy’s One Stamp Six Ways online course, instructed by Justine Hovey. I took this class as part of my Altenew Academy Level 3 certification. The idea of this course is to find different ways to imagine the same stamp (or die, focal point, etc) into six different, unique card designs. Justine demonstrated six different ideas using the same stamp, Vintage Garden from Altenew. It is a beautiful set! The main stamp is two different flowers and a couple leaves. I found a stamp set in my stash that was similar, the Paint-A-Flower: Camellia Waterhouse set.
The inspiration for this card came from one of Justine’s card designs, where she stamped white ink onto black paper, and black ink onto white paper, cut the paper in half, and pieced the design together. I liked the clean and simple look of her card, however I felt that I would want to color the flowers. I also thought it would be neat to cut the design with a curved line, more like a yin-yang design. I wanted to use some kind of medium that would be opaque on the black paper so the color would show on both the white and the black sides of the card. I decided to use Distress Mica Sprays, so I chose to start with black and white watercolor paper.
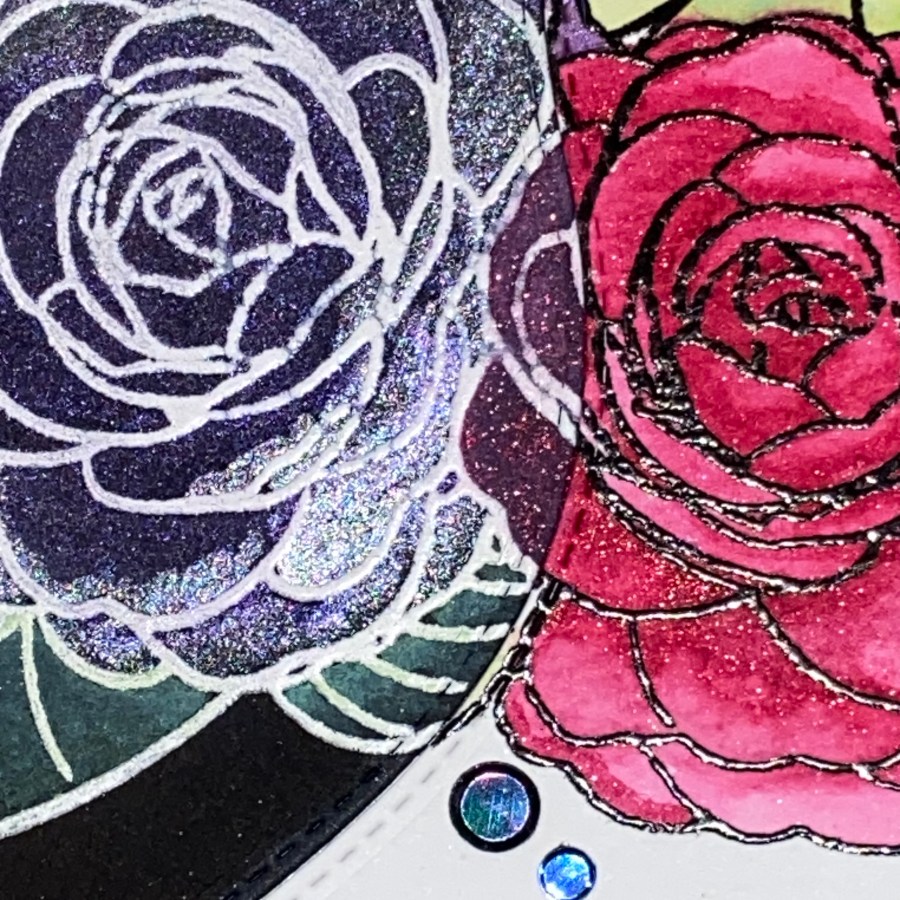
I had a harder time with the black watercolor paper than I expected. First off, whether I used VersaMark Ink with White Embossing powder, or used White Pigment Ink with Clear Embossing Powder, it seemed like the paper sucked up the ink too fast, and I couldn’t get a good layer of the embossing powder to stick. This definitely became a learning experience! You might notice the white outlines on the black paper are kind of splotchy. The Perfectionist in me spent a good hour trying many differnet combinations to get the best coverage. I’m still only marginally happy with this one. What worked the best for me in the end was to stamp with White Pigment Ink, and quickly add Clear Embossing Powder, and heat set. I used a stamp positioning tool so that I could do this TWICE, on top of each other. Then, I cleaned off my stamp, applied some anti-static powder to the black paper, stamped the image with VersaMark Ink, and then added White Embossing Powder. Phew! Maybe in hindsight I should have tried regular black cardstock so the embossing might turn out better, and then see if I could use the mica sprays to color in the flowers, without getting the paper too wet.
The white watercolor paper was easier for some reason – I stamped several times in VersaFine Onyx Black Ink, and then applied clear embossing powder and heat set it. I was happy with the result.

I used a die that was designed to cut rolling hills to cut each of the flower clusters in half with the same curved line. I made a little contraption to hold the die in place to cut both the white paper and then the black paper in the same exact place, so that they would fit together perfectly.

Starting with the white watercolor paper side, I colored the flower using the red Yuletide Distress Mica Spray and a paint brush. I spritzed some of the spray onto my craft sheet, and painted it on in a very rudimentary way, just layering it to get a darker shade in some areas. I was hoping it would look more similar when I painted on the black watercolor paper side, but the Mica Spray wasn’t opaque enough. I tried painting on some white pigment ink underneath the Mica Spray, but it didn’t seem to make very much of a difference. Maybe Distress white paint would have helped? I’ll try that next time. I painted the other flower using Hocus Pocus (purple) and Frozen Fog (very light purple-silver) Mica Sprays. For the leaves, I used Mowed Lawn Distress Oxide Spray on both the white and the black sides. After seeing how different the leaves looked, I decided I liked the little bit of the red overlap much better. There is a touch of purple flower on the white side. I probably should have planned it better so there would be more of both flowers on each side. Next time!
I used a small “you & me” sentiment, stamped directly onto the white side. I was looking for a “You Complete Me” sentiment, but I don’t have one. I thought that would be cute, especially with Valentine’s Day coming up.
Before I added the sequins, I thought the black watercolor paper wasn’t as black as I wanted it to be. It might have been residue from the anti-static powder. I used a bit of Black Soot Spray Stain with a small paint brush to go over the black paper. I think it darkened it up just a touch, and emphasized the contrast.
Thank you for stopping by my blog – I appreciate you! Give yourself permission to take care of yourself today and spend time doing what fills your heart!
Altenew products used:
Altenew Painit-A-Flower: Camellia Waterhouse Outline Stamp Set
Also used:
Ranger Distress Mica Sprays – Yuletide, Hocus Pocus, Frozen Fog
Ranger Distress Spray Stain – Black Soot
Ranger Distress Oxide Spray – Mowed Lawn

Vicki, this is beautiful! I love how the two colors complement each other and create a dramatic effect. The contrast between light and dark is so striking and beautiful.
LikeLike