
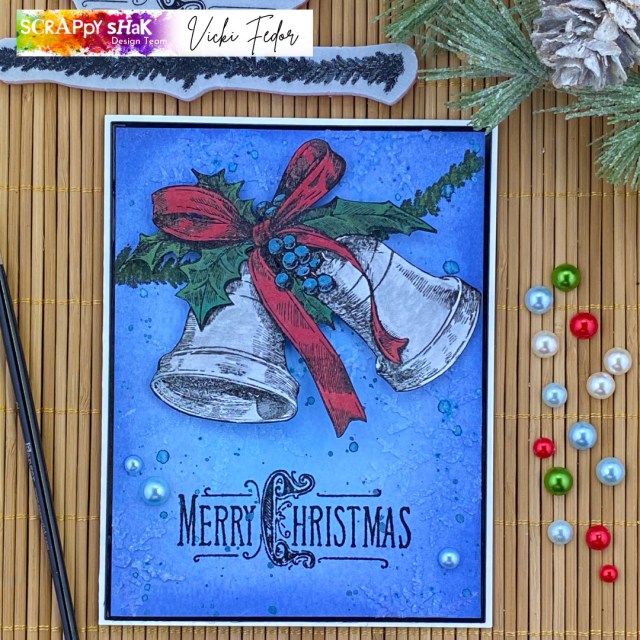
Hello again crafty friends! I wanted to share this card with you that I made for the ScrappyShak Design Team. The main element was the new Tim Holtz Stamper’s Anonymous Department Store stamp set. I wanted to share my process with you in case you would like to replicate this card. I ended up changing a few colors, so the leaves and the bow are actually layered – distress oxide first, then painted with mica stain.
I think I put too much pressure on. myself with this, because I really wanted to do something different. I had seen a lot of makes by other people on social media, and I wanted to do something different, in my own style, whatever that means. I knew I wanted silver bells. I started playing around with stamping on silver metallic cardstock. I used Archival ink, embossed with clear embossing powder. I liked the bells, but I didn’t like the rest of the stamp on the metallic paper. I wasn’t sure how the inks would work on the metallic paper. I thought about fussy cutting the bell part, and then stamping the bow and leaves on watercolor, and piecing them together. But, I also didn’t want this card to be so complicated that you would say “that’s nice, but too much work”. Everyone is so busy this time of year!
The stamp is beautiful. Very intricate, and very detailed. Trying to keep the beautiful detail of the stamp, I stamped on smooth Neenah Classic Crest Solar White. Because I didn’t use watercolor paper, I knew I’d have to use water or spray stains sparingly. I stamped with Archival Jet Black ink, and embossed with detail clear embossing powder. I though this would help keep the color where I wanted it, and keep the lines of the stamped image clean. It worked well when I was using oxide ink, but it didn’t resist the brushed pewter as well as I wanted it to. It’s still lovely in my opinion!

My first coloring was using Distress oxide ink pads. I smooshed them on my craft mat, and then used my smallest Ranger paint brush to apply the color to the stamped image. I used Lumberjack Plaid and Pine Needles. For the berries and bells, I sprayed a bit of Winterfrost Mica spray stain on my craft mat, and painted it on the berries. I did the same with the Brushed Pewter for the bells. Several thin layers are best with this paper. TIP: If you’re painting on inks or sprays like this, the embossing powder will resist the medium, and sit on top of it. So as not to smear everything, paint one color and one area at a time, then carefully blot the excess off with a clean paper towel before moving to the next section.
I fussy cut the stamped image. Here’s another TIP: If you’re not leaving a white border when cutting out a stamped image, use a marker in the same color as the stamped image around the edge of the paper. This will cover up and imperfections in your cutting, and also give it a more finished look. After I finished (my first round) of coloring, I decided on the background colors. I went for blues to match the berries. I wanted the card to have a lighter blue behind the bells, gradually incerasing in intensity to the edge of the card panel. I used Distress Watercolor cardstock, and started with Tumbled Glass Oxide in the middle of the card panel, applied with a blending brush. Then I switched to Stormy Sky, which I only had in a Distress Ink pad. I would later add Faded Jeans Oxide around the edges. Use what you have! The Inks and Oxides blend well together. I think blending foam would work just as well if you don’t have brushes.


I stamped my sentiment in Archival Jet Black, and embossed with clear embossing powder. I added some splatter with the Winterfrost Mica Spray. To add some texture, I used Snowfall grit paste through the Snowflake stencil, THS050, moving the stencil and placing the snowflakes all over the background. Once I got the background done, I decided I wasn’t really happy with the pine needle coloring on the leaves, so I rummaged through my mica stains, and found Tree Lot Mica Spray from last year’s Christmas collection. I spritzed some on my craft mat, and colored in the leaves. After that, well, the bow just looked like it needed some sparkle too. I used Tart Cranberry over the Lumberjack Plaid. I suppose if you are reproducing this card, you could just use the mica sprays to paint the image, but I’m not sure if it would look exactly the same, since the oxide inks add a base layer underneath the sprays. If I were to make this card again, I would definitely try it with the mica sprays first, and skip the coloring with the oxides first. I just wanted to be clear explaining my process in case your card doesn’t look exactly as you expected. I also wanted to share that as long as the ink is dry, you can change the color by layering something else over the top if you’re not happy, especially if it’s in the same color family.
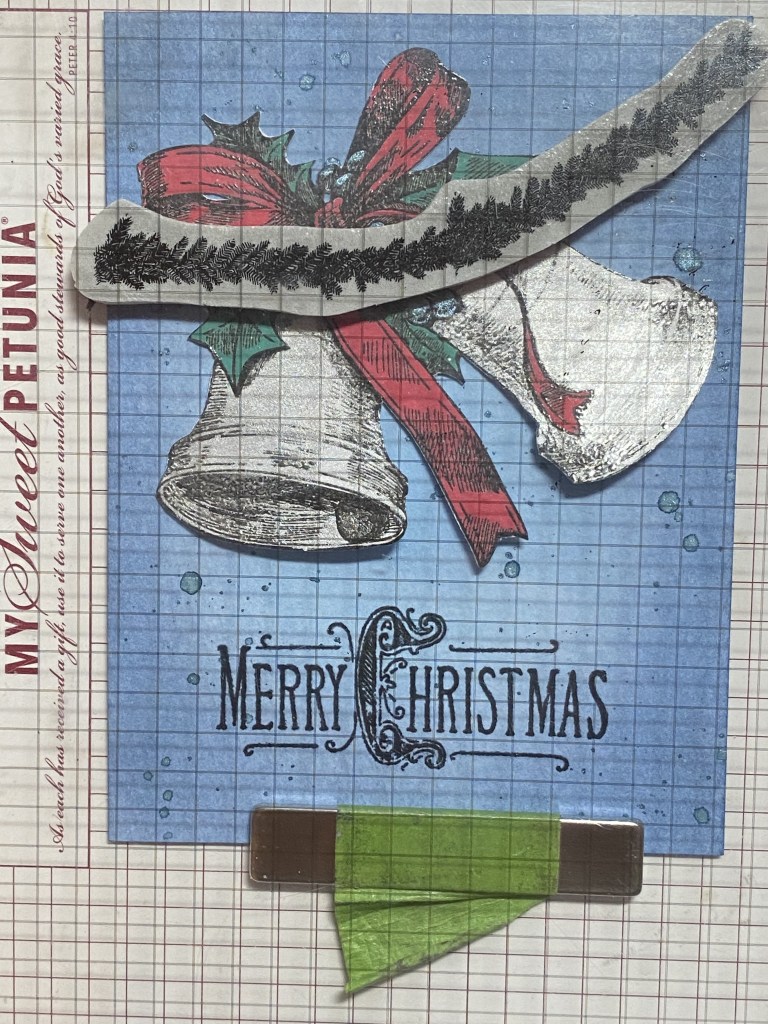
To visually “anchor” the bells to the card, I used a strip of garland from the Darling Christmas stamp set. You could make a garland out of any small pine stamps you have, or skip this part. I positioned the garland strip in my stamping tool in a curved shape, using the bells to position the garland, and stamped in Archival Jet Black, and then colored by painting on Tree Lot mica stain. I attached my bells to the card using dimensional foam squares. I blended Faded Jeans oxide around the edge of the panel, and added 3 blue Christmas Droplets.


I tried to show the shine of the mica sprays… the photos don’t really do the justice. To finish the card, I layered the panel onto shiny black cardstock and then attached it to an A2 cardbase made with Neenah Solar White Classic Crest 110 lb. cardstock. Thanks for stopping by my blog, and happy making season to you!
Products used, available at ScrappyShak:
Tim Holtz Department Store stamp set
Tim Holtz Darling Christmas stamp set
Distress Oxide Ink – Tumbled Glass, Faded Jeans, Lumberjack Plaid, Pine Needles
Distress Mica Stain – Tart Cranberry, Tree Lot, Winterfrost, Empty Tomb
Distress Spray Stain – Brushed Pewter
Distress Grit Paste – Snowfall
Distress Watercolor Cardstock
Ranger Archival Jet Black ink pad
Idea-ology Droplets – Christmas
Also used:
Tim Holtz Stencil THS050 Snowflakes
