
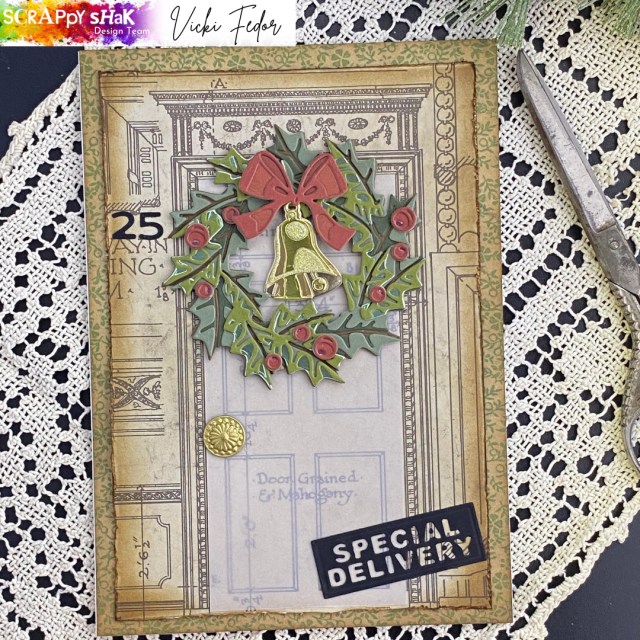
Hello crafty friends! I wanted to share this card that I made for the ScrappyShak Design Team. The inspiration was the Yuletide colorize thinlit die, and also the Christmas Backdrops paper pack.
This card ended up nothing like I had originally planned! I wanted to make a wreath featuring colors that my son and his partner were using to decorate their home for the holidays – pink, silver, and sage green. My plan was to color watercolor paper using distress inks and sprays, and then assemble the wreath. When I started to look at the dies, I wasn’t sure exactly which colors I wanted to use for the different layers. I figured I had better assemble the wreath with cardstock first, so I could decide how I wanted to color my watercolor paper for the differnt layers. I also thought that I would use a coordinating paper from the Christmas Backdrops papers for the background. That got me going in a whole different direction!
I found the Backdrops paper that looked like an architectural drawing of the front of a home with a door that was pretty much exactly the right size for the wreath. I didn’t think the pink and sage wreath would go the best with this background paper. Looking through my stash, I was drawn to the Idea-ology Kraft stock paper stacks. The coordinate so well together. I pulled out some greens and reds, and decided to use them instead. The pink and sage green wreath would have to wait for another day!
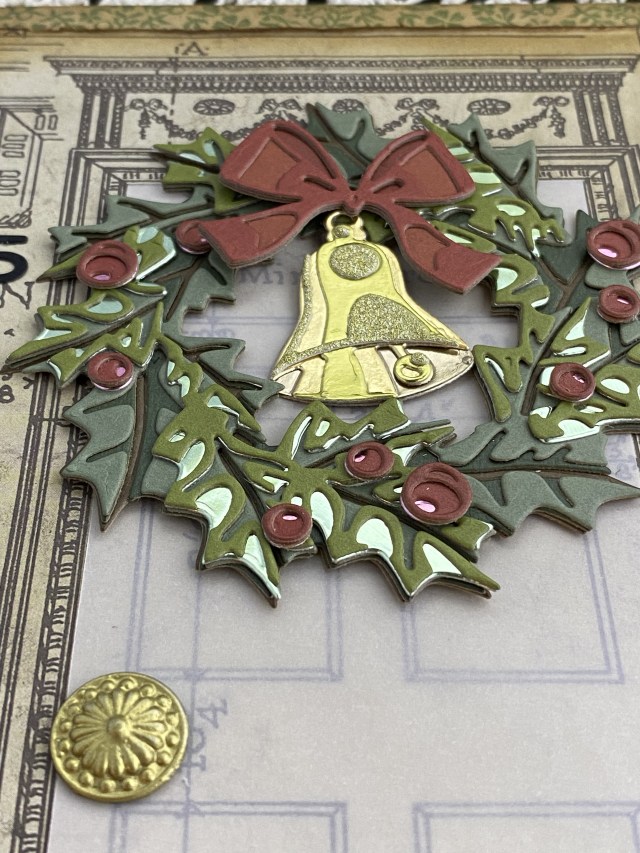
Then I had the thought – wouldn’t it be neat to use only the papers in the idea-ology line? I needed 4 different greens to make the wreath, but there were only two that I thought went together in the Cool paper stack. I ended up using a dark brown from the Neutral paper stack for the base, and added in a metallic green from the Metallic Confections pad. I used three different reds from the Warm paper stack for the bow, and added a metallic pink from the Confections pad for the base layer of the berries. For the bell, I used two gold colors from the Metallic Confections pad, a gold from the silver and gold metallic paper pad, and the gold from the Christmas Deco sheets.

TIP: You don’t have to be a hero and figure out this die on your own! Go to Sizzix.com and check out the video for this die. Otherwise you might start to have a panic attack, like I did! I honestly almost gave up before I watched the video (several times). It is easier than it looks, once you get the hang of it.

The tricky part is the third layer of the wreath. The fourth layer goes right on top of the third in the same orientation. It really is gorgeous in real life, and certainly worth the effort. Photos do not do it justice. I found the berries to be somewhat frustrating, because they are so small, and I absolutely hate glue oozing out of the teeny tiny pieces. Next time I will definitely use double sided adhesive on the back of my paper before I die cut the berries. I’ve also seen many people using sequins, droplets, or other round embeliishments as a replacement for the paper berries, and they look fabulous as well.
To make the door stand out a little more, I cut a piece of vellum to fit over it, so you could still see the details on the door. I found an old brad that I wanted to use as a door knob, but it was silver, so I colored it with Distress Foundry Wax in Gilded, and heat set it. Another TIP: If you heatset something metal it will get VERY HOT! Use something to hold the item, and then don’t touch it to see if it’s dry (speaking from experience)!
I distressed the edges of the Backdrops paper, and added Vintage Photo Distress Ink. I layered this on top of another piece of the Backdrops paper, and then attached them to a 5×7 card base.
I wanted to add a house number and a sentiment. I found the right size numbers in the Postale die set, and decided to use the “Special Delivery” as the sentiment. Both of those were cut out of black alcohol ink cardstock, my favorite black paper. They need to make the black alcohol ink paper in “regulation size” sheets instead of the 5×7 size!
If you have this die, I hope you are inspired to give it a try. I’d love to see what you make, especially if it’s pink and sage green! Thank you for stopping by my blog, I appreciate you!
Products used, available at ScrappyShak:
Tim Holtz Sizzix Yuletide dies
Tim Holtz Sizzix Postale dies
Tim Holtz Idea-ology Christmas Backdrops Paper
Tim Holtz Idea-ology Kraft-Stock Metallic and Metallic Confections
Tim Holtz Idea-ology Christmas Deco Sheets
Tim Holtz Black Alcohol Ink Cardstock
Distress Foundry Wax Gilded
Also used:
Tim Holtz Idea-ology Kraft-Stock Cool, Warm and Neutral
Tim Holtz Tonic Paper Distresser
